Showing posts with label Revit how to. Show all posts

Back to Basics – Conceptual Masses in Revit 2011

image

I am still surprised by the amount of questions and queries I get from users who are trying / starting to use Revit’s conceptual massing tools in either RAC 2010 or RAC 2011. The most common queries relate to how you actually create a particular form. I am suppose pre 2010 it was straight forward as we had extrude, revolve, sweep, blend and swept blend. The way you used these form making tools was very explicit; need to create an extruded form? Then use the extrude tool. Revit 2010 changed all that with a far more flexible approach to form making, but to some extent it tossed away the rule book and I believe that is what has confused some users. If you don’t do a lot of massing in Revit, this new paradigm can also lead to confusion and a certain amount of head banging!! I’ve had experienced Revit users get totally stumped when creating even the most basic forms. Once you understand the behaviour and the philosophy to form making, creating complex forms gets a lot easier.

So it made sense to create a series of short videos which explained how to create some common forms in Revits conceptual design environment. Experienced users who use the tools will know all this, but for those that don’t, I hope this is of assistance. I have deliberately avoided any voice over, so you force yourself to review the tools and commands being picked. It is all about creating the forms and I deliberately does not delved into model lines versus reference lines, pure geometry only. I am sure there are many ways to create some of these forms, but these in my view these are the most obvious steps.

You will find videos which you how to…..

  • Extrude
  • Revolve
  • Blend
  • Sweep
  • Swept Blend
  • Cone
  • Dome
  • Sphere
  • Torus
  • Loft 1
  • Loft 2
  • Pyramid


1. Extrude


2. Revolve


3. Blend


4. Sweep


5. Swept Blend


6. Cone


7. Dome


8. Sphere


9. Torus


10. Loft 1


11. Loft 2


12. Pyramid

Adapt your points of view – Revit 2011

A few years back when I worked for a well known UK reseller, a colleague and I put together a presentation to demonstrate how Inventor and Revit could work together. Part of this presentation showed how to model in Inventor and then pass the geometry to Revit as a SAT file for use within a Revit project. Of particular interest at the time was Inventors adaptive capabilities and we used these to great affect in a structural atrium support solution.

image

Whilst this was a virtual design concept, the original idea came about from a real project I had been involved in 12 years earlier with Househam Henderson Architects. This was for a TV company that were refurbishing a building, turning it into their new offices and studios in central London. The building being renovated had an enclosed court yard which was opened to the elements, but the plan was to enclose this courtyard with a glazed roof to form an atrium. This would provide a cafe and a social area for staff and visiting guests. One issue was that the new glazed roof would need supporting from the atrium floor level. 

1276_N11

So a structural tree support system was designed to support the roof. At the time this was modelled in AutoCAD release 13, yes you did read that right, that's how old the project is! The big challenge at the time was the scheme constantly changed as the designer and the structural engineer refined the concept further. Load distribution was a nightmare! My special thanks goes out to Househam Henderson for allowing me to use the image above.

So when I saw the new adaptive component family in Revit 2011, I immediately got excited as I remembered the modelling challenges I had encountered in the past. Whilst Inventors adaptive tools resolve the problem, I wanted to do this in Revit! :-)

image 

Understanding how the new adaptive points react and their various parameters is without doubt the key. This short video introduces you to the new adaptive family and demonstrates how to create a simple structural tree support. Hope this is useful…..

Pointless stuff, Offset parameter in Revit massing

This article builds on recent posts on the use of Reference point, when working in the conceptual massing environment. The more I use them, the more I realise how powerful they are.

If you place a “Reference Point” and take a look at its Instance properties, you will discover its a System Family.

image

You can control how it displays in the conceptual environment; for instance you can change the Show Reference Planes Parameter. You are provided with three options “Never”, “When Selected”,  “Always”. You can also control its visibility by enabling or disabling the “Visible” parameter.

image

Under the Graphics section we can say whether its “Driven by Host” and you will also see an “Offset” parameter. We can also name the point. Lets focus on the “Offset” parameter.

We can drive the offset parameter, thus moving the point by adding a figure into the “Value”. This offset distance is based on the plane the point was originally position on. So if we add 1m into the offset it will move the point 1m in a “Z” direction, assuming it was position on the X,Y plane.

image

Now the smart thing here is because the point has a total of three planes, XY, ZY,ZX, we can also place points on these planes and drive points using there offset from the planes.

image

Take a look at the video which should hopefully explain this in more detail.

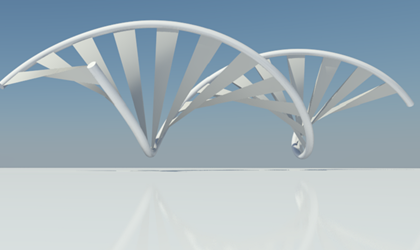
Helix from lines and points

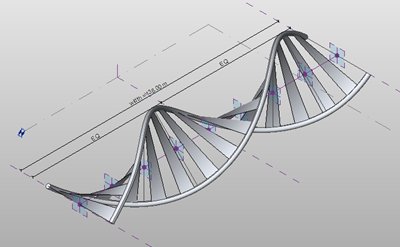
Following two great blog posts on creating helix’s; one from Buildz blog and the other from BIM troublemaker, I thought I’d run through my solution to this problem. I have been experimenting with this for a few weeks now; not being great at math, I wanted to see if I could create a helix without the need for heavy formula.

image

Hopefully these two videos will explain my approach; I’ve had to split the the how-to video into two parts, due the 11 minute YouTube limits! They include all the normal mistakes, so don’t expect a super slick video. :-)

If you interested, you can also download the family from here.

Get the hosted point?

This post comes from experimenting with hosted points on lines and arcs and attempting to create a helical form in the massing environment similar to Zach Kron’s recent post. I guessed that you could do something similar using lines connected to hosted points on circles.

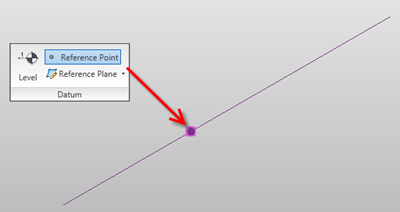
So let go back to basics. Points can be hosted to lines, arcs, splines, circles and ellipses (either reference line or lines). Just draw a line or reference line then choose the point tool and place the point on the line. It will snap to the line and  you will  notice it will change in size and will now include a work plane.

image

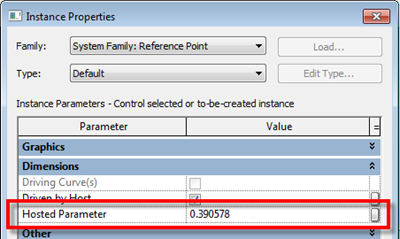
If you select the point and choose properties, you will discover that there is now a hosted parameter. This parameter drives the position of the point and it goes from 0 to 1. “0” being one end and “1” the other end. If you wanted to place the point half way along the line, plug in 0.5, voila the point is position half way along the line.

image

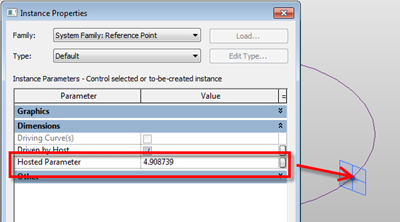
So lines are straight forward, what about circles or even ellipses? Hmmmmm Ok, go ahead do the same thing, but this time draw a circle as a line or reference line and place a point on the circle. Go check the properties of the Hosted Parameter…. No 0 to 1???? some other weird combination of figures????!!!

image

So what’s going on here? Well I’m no mathematician, so after a bit of investigation I discovered that points are managed differently on closed elements such as circles. You need to go back to do some math…

So the hosted parameter value for a circle is 2pi

(where pi is 3.1415926535897932384626433832795)

therefore  2 x 3.141593 is equal to 6.283186 radians

So the hosted point can have a value between 0 to 6.28318 depending on where it is on the circle.

So to split the circle into degrees

1 degree=2pi/360=0.017453 radians

With this logic in mind try this, create a circle in the massing environment and host a point on the circle. Go the the hosted parameters, then plug in the following figures and watch the position of the points change.

  1. 0 degrees - 0 x 0.017453 = 0
  2. 90 degrees – 90 x 0.017453 = 1.570796
  3. 180 degrees – 180 x 0.017453 = 3.141593
  4. 270 degrees – 270 x 0.017453 = 4.712389
  5. 360 degrees – 360 x 0.017453 = 6.28308

This opens up to interesting opportunities and allowed me to create the helix using points and lines along with nested families. I’ll show you how I did this in another post……

image